Glazing and Firing Paperweights
The paperweights had to dry for about a week until they were bone dry. I sat them on offcuts of plaster board that I changed daily. When they were nearly finished I put them on a wire rack where they could get air right around them to complete their drying.
The paperweights then had a firing to 1000 degrees Celsius (1832 F) in the electric kiln. This temperature gives porous and somewhat fragile pottery that is reasonably easy to glaze and decorate. This firing is known as a bisque firing.
Here is a view of the newly fired paperweights. I fired them upside down to allow steam to come out and heat to go in easily.
I supported the paperweights on the porcelain rings that I made for them for when they are glaze fired.
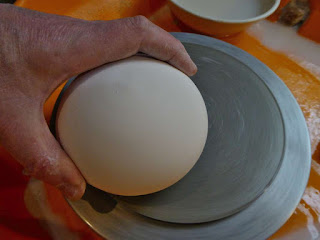
The rings were unloaded then carefully ground with an abrasive diamond disk that I stuck to my potter's wheel with a ring of clay.
Each paperweight was carefully ground smooth underneath where it was going to contact its matching porcelain ring.
A good tight fit is important.
The rings were then stuck to the paperweights with a mixture of a water based general purpose wood working glue and Alumina Hydrate. The glue burns out in the firing leaving a thin protective layer of alumina between the paperweight and the ring that it sits on. This layer of alumina will help paperweight and ring part company after the firing.
Here are some freshly glazed paperweights sitting comfortably on their ring of porcelain in their individual glaze catching bowls.
I like to pour my glazes, and for this I use an old milk saucepan that has a pouring lip. With a degree of confidence, and some sleight of hand, it is possible to get quite a nice coating of glaze all the way round a piece of pottery with one continuous pour. Crystalline glazes are generally put on much thicker than a regular glaze, so, holding the paperweights upside down by the glued on ring, I poured two layers without stopping, and also gave the top of each one a quick dip in the glaze bucket. You really need the glaze to be very thick at the top tapering to fairly thin at the lowest point. The glaze will run like mad when it is at high temperature, so you need to allow for that! After 2 or 3 minutes I then applied a little more glaze with a soft brush, and smoothed off any really high spots with a very slightly damp sponge.
The paperweights each have a stoneware glaze catching bowl put under them. Any drips and runs have to be contained. A lot of glaze can run off a crystalline glazed pot when at high temperature, and it can destroy kiln furniture and stick a pot to a kiln shelf with destructive enthusiasm!
Crystalline glaze firings really need a kiln that will get to temperature quickly, and also lose temperature fast when required, so it is usual to fire with little or no kiln furniture. I have just one half shelf in the kiln in this firing.
This kiln is manually controlled, there is no controller or over temperature safety cut out, or any frills at all! Just me! The pink, white, and yellow pointy things are pyrometric cones that will bend over when they reach their designed temperature. I also have a pyrometer to give some idea of the air temperature in the kiln, this reads between 45 to 55 degrees (113 - 131 F) low at high temperature so the temperatures in my kiln log book look a little odd. Cones are definitely the best guide of all.
The firing was 18 and a half hours from switching on the kiln to switching off. The first 700 degrees (1292 F) was fired slowly overnight whilst the weary potter tried to sleep, leaving the rush to peak temperature for the next morning.
A peak of Cone 10 was reached just before midday, then the temperature was allowed to drop to about 1100 (2012 F), and then held for just over 4 hours to allow time for crystals to grow. I made several adjustments to the growing temperature to try to affect the character of the crystals. Crystals grown at high temperature tend to be spiky, and crystals grown at a lower temperature are much rounder and more like pansy flowers. By varying the growing temperature, it is possible to exploit these different characteristics.
I am happy to report that the glaze firing was a successful one, here is a quick look into the kiln that I opened just 3 hours ago.
Tomorrow I will have the "exciting" and nervous time of separating the paperweights from their porcelain rings. I hope that the alumina did its job!
All going well... more photos will follow of the completed paperweights and I'll share a glaze recipe or two.


Comments
Good to hear from you. It is only when I write the process of making pots down that I realise just how long things really take! Maybe it is best not to know! :-)
Hi Melissa,
It is quite a process, but can still feel like "Christmas" when the kiln lid is opened and something nice is inside!